
Making goat cheese is fun and super easy! The basis for all of my flavored goat cheeses is a simple fresh mozzarella style and then I experiment from there. Our favorite flavors are Cilantro-Jalapeño and also Ghost Pepper.
This post contains affiliate links to get you on the right track with supplies you will need. View our affiliate disclosure policy here.
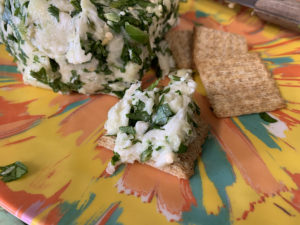
There’s nothing quite as yummy as grabbing some homemade goat cheese and crackers. Or melting it over the top of some nachos. Or crumbling it on top of a salad. Or layering it on your favorite sandwich. MMMMMmmmm.
My husband goes crazy over fresh goat cheese. So does my son. So do I, for that matter! Good news though! If by some miracle you don’t eat it all as soon as you’re done making it, you can freeze it and save it for months (or years!)
The first time I tried goat cheese was almost 15 years ago. My mother in law was making her cilantro jalapeño goat cheese and my husband wanted me to try it. It did not disappoint! It was slice-able and worth dying for if you had a box of garlic herb Triscuit crackers!
Fast forward 15 years, I got my own herd of milk goats and making homemade goat cheese was high on my priority list. We scarfed down the first blocks of cheese immediately. It never even made it to our fridge.
After making some for friends, I started getting requests for different kinds of cheeses: feta, mozzarella, hot pepper cheese, cheddar style, farmers (soft) style, etc. The feta is amazing, but the original Jalapeño Cilantro flavor is a tried and true favorite.
Get the whole family involved in helping make their favorite kind of cheese! Cheese making is a fun process and can be a science experiment for your kids! This is the perfect project to get them involved! No liquids will be hot and they can happily stir and measure the ingredients for you! Did someone say, “Homeschool class?”
One of the things that has been very helpful for me along the way has been this Home Cheese Making book by Ricki Carroll (available on Amazon)! Tons of recipes and helpful tips if you’re using goat milk instead of cow milk! I use it all the time!
My older son got really excited by this book (which we own and have used): Say Cheese! A Kid’s Guide to Cheese Making also by Ricki Carroll and Sarah Carroll (available on Amazon). This makes a great gift for the young cheese makers in your life!

Before you start, there’s a couple of things you will HAVE TO HAVE!
- A cheese press of some sort is a MUST HAVE! As the name suggests, it presses the remaining whey out of the curds so they become a firm block. My presses are homemade by my awesome and amazing husband. However, Amazon has some very affordable beginner level presses such as these ones. I also recommend Cheesemaking.com.
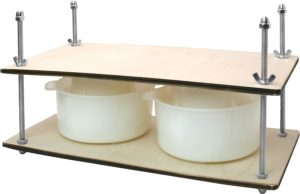
I like this press from Amazon for $39.99 for beginners because it has two cheese molds and can press at adjustable weights up to 50 lbs, which is great for many different cheeses as you branch out with cheese making!
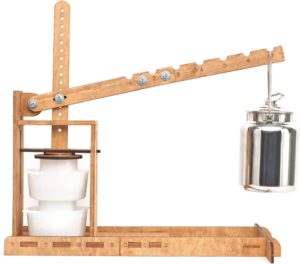
If you want to step up to a Dutch press, this press is available on Amazon for $69.99 and claims it can press at adjustable weights up to 200 lbs, which is above and beyond what you will likely need.
2. You will need a large heavy bottomed pot for warming the milk. I use a 3+ gallon tamale making pot because I like to use what I have on hand. You can use a smaller 5 quart stock pot if you have one but it will only make about 1 pound of cheese at a time! Once you start making cheese regularly, you’ll want to make a lot at once.
3. You must have Rennet. There are several types of rennet: tablets and liquid. Vegetarian and non-vegetarian. I like to use organic liquid vegetable rennet, but it’s up to you!
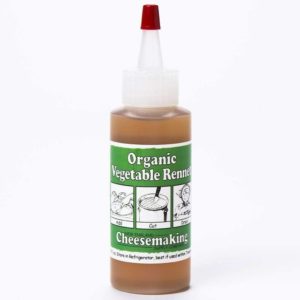
Here’s the type of rennet I use, available on Amazon. Rennet is essential in the cheese making process to curdle the milk and separate the curds from the whey.
4. You will need a colander, a large metal slotted spoon and a cooking thermometer. You probably have these items in your kitchen. If you don’t have a thermometer, this is the type I recommend:
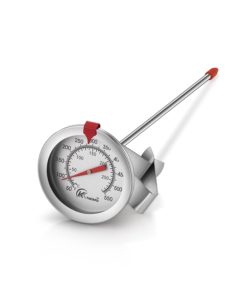
This thermometer clips to the top of the stock pot when warming the milk so you can clearly read the temperature while working. Available on Amazon (you can probably find a similar one at your local grocery store also).
“The secret to making goat cheese is to not be in a hurry. Cheese making takes a little time to do it right. Don’t rush.”

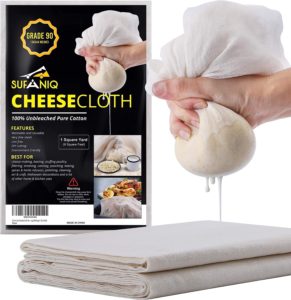
I use raw goat milk that has been in the fridge a couple days and is starting to separate cream. I use a colander instead of cheesecloth to drain my curds for this recipe, but you will eventually want to try some recipes that use cheesecloth in the draining process. You will want a fine weave cheesecloth, not the typical kind sold in grocery stores. I recommend something like this kind from Amazon!
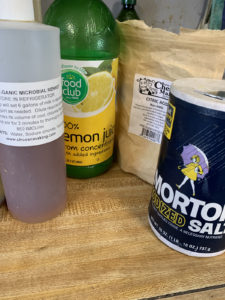
I use fresh lemon juice instead of citric acid to start the process of curdling when the milk is still warming up. It takes about 2 tablespoons of lemon juice for 2+ gallons of milk. This is OPTIONAL! You also have the option to use a cheese culture when the milk is up to temperature (think feta)! Mesophilic culture is ideal for milk being processed at a temp under 100 F degrees.
Making Homemade Goat Cheese
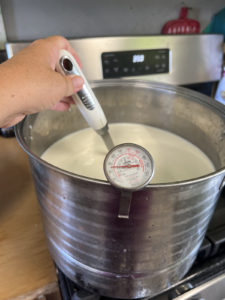
Step 1 – Heating the Milk
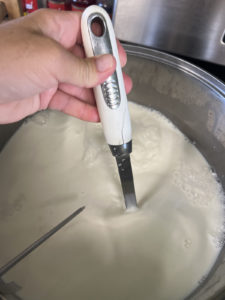
I heat my raw goat milk slowly to 80 F over low heat while stirring the bottom. I used to follow a recipe that used a slightly higher temp, but I have found from experimenting with other recipes that this temp produces the best result with coagulating the milk.

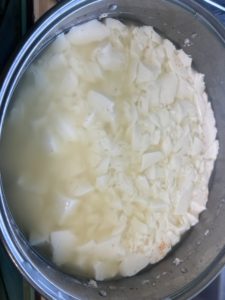
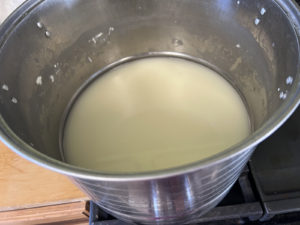
Curds and Whey
Step 2 – Adding the Rennet
The next step to making homemade goat cheese is adding the rennet. After I turn off the heat at 80 F degrees, I add approx 1/2 teaspoon of rennet in 1/4 cup of cool water while stirring from the bottom up. Next, “still” the milk (stop stirring) and cover for 30-45 minutes to let the curds form a clean break.
I recommend purchasing liquid rennet (I use organic microbial vegetable rennet) from New England Cheesemaking Supply Co. It’s also available on Amazon with free Prime shipping. New England and Amazon also have cheese presses, cheese cultures and other supplies when you’re ready to go big!
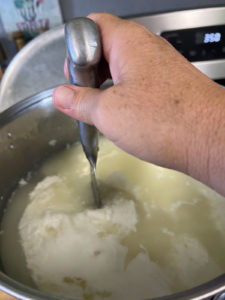
Test the curd to see if it cleanly separates when penetrated with the thermometer, a spoon or knife. This is called “clean break”. If it does, its time to cut the curds! Cut horizontally and vertically to form a 1″ grid pattern (approximately), then cut at a diagonal. The purpose is to gently cut all the curds to a smaller size to drain as much whey out of them as possible, as easily as possible.
After cutting the curds, let them rest for 5-10 minutes. This helps more whey release from the curds, making the draining process easier.
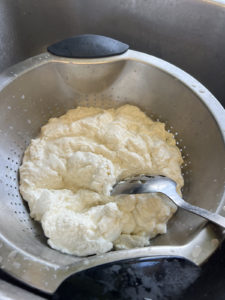
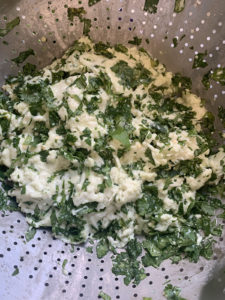
Step 3 – Draining and Salting the Curds
Next, drain the curds. I stir them g add a generous amount of salt and the flavoring of your choice (jalapenos, cilantro, dried chilies, etc.). You may choose to keep the whey. There are many uses for it. I taste test a curd or two to make sure there’s enough salt.
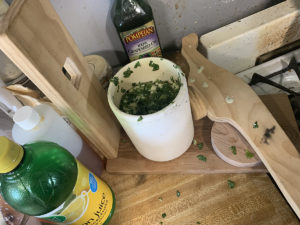
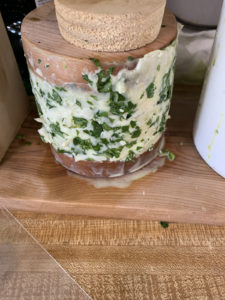
Step 4 – Pressing the Cheese
I use a homemade cheese press to press the curds into a firm block of cheese. It must sit for several hours (like 3-4 hours) with about 10-15 lbs of weight to press any additional whey out of the block. You want to see the press stop leaking whey. This can be a messy process. I set my cheese press down into my sink or on a large pizza pan to catch the whey as it leaks out.
Enjoy your homemade goat cheese creation!
This fresh-style cheese doesn’t need to be ripened or aged like more advanced cheeses and can be enjoyed immediately! As I mentioned above, goat cheese can be frozen and keeps well for future use.
Next, check out my other blog posts! Subscribe and never miss out!
